Disclaimer: This post contains affiliate links. If you click and make a purchase, I may receive a small commission at no extra cost to you.
Taking simple geometric shapes and turning them into a wearable? Uh, yes please!
I recently saw a top that used a really clever structure to get two completely different looks out of simple rectangles, and I knew I had to try making my own version!
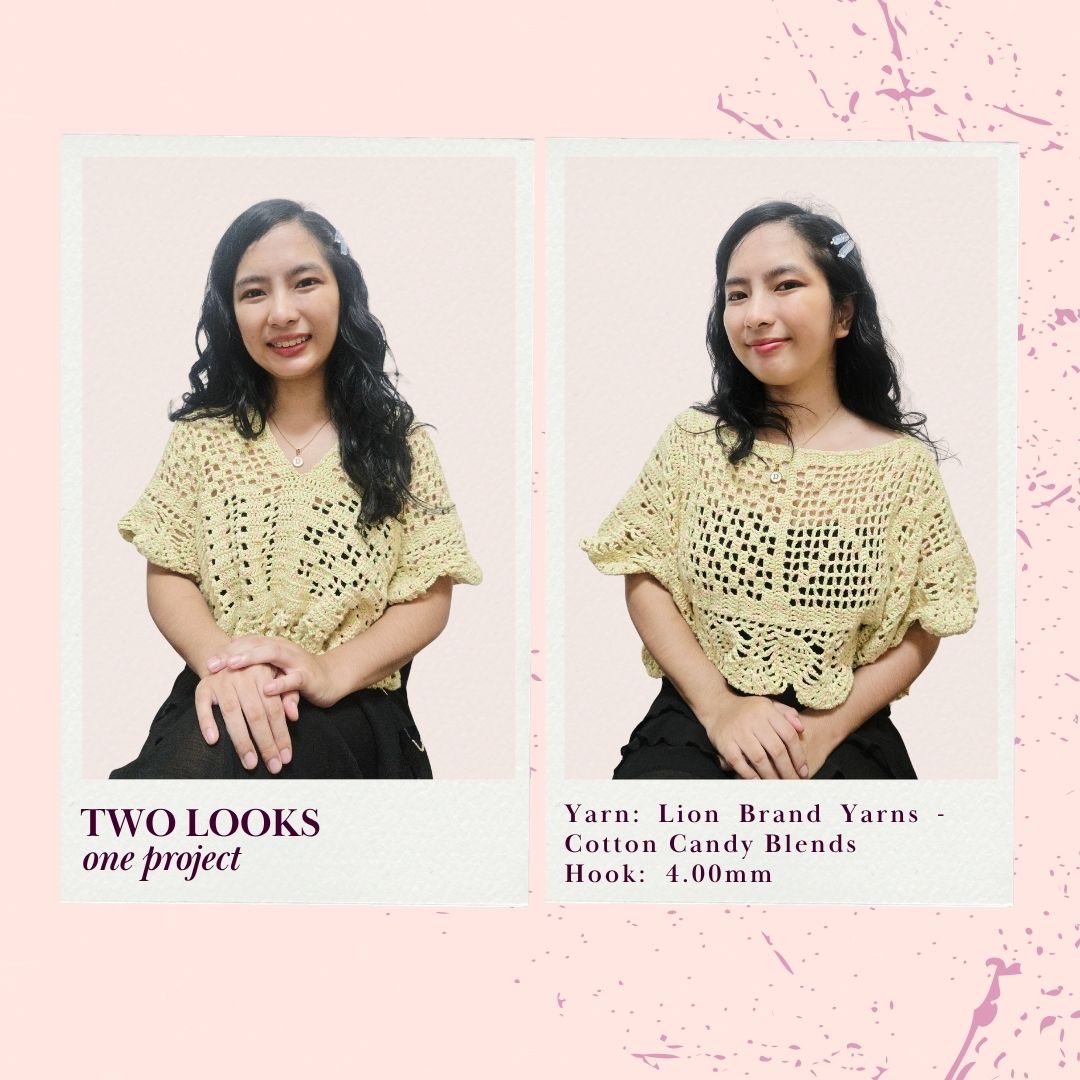
Without relying on a pattern, I grabbed my hook and drafted this breezy 2-in-1 mesh top. But you won’t have to start from scratch— I created a pattern I for this piece!
Depending on how you wear it, you get two distinct necklines and silhouettes from the exact same piece.
The Yarn & Hook Setup
For this project, I used about two and a half skeins of Lion Brand Cotton Blend (in the shade Cotton Candy)—a soft, sunny yellow with subtle colorful specs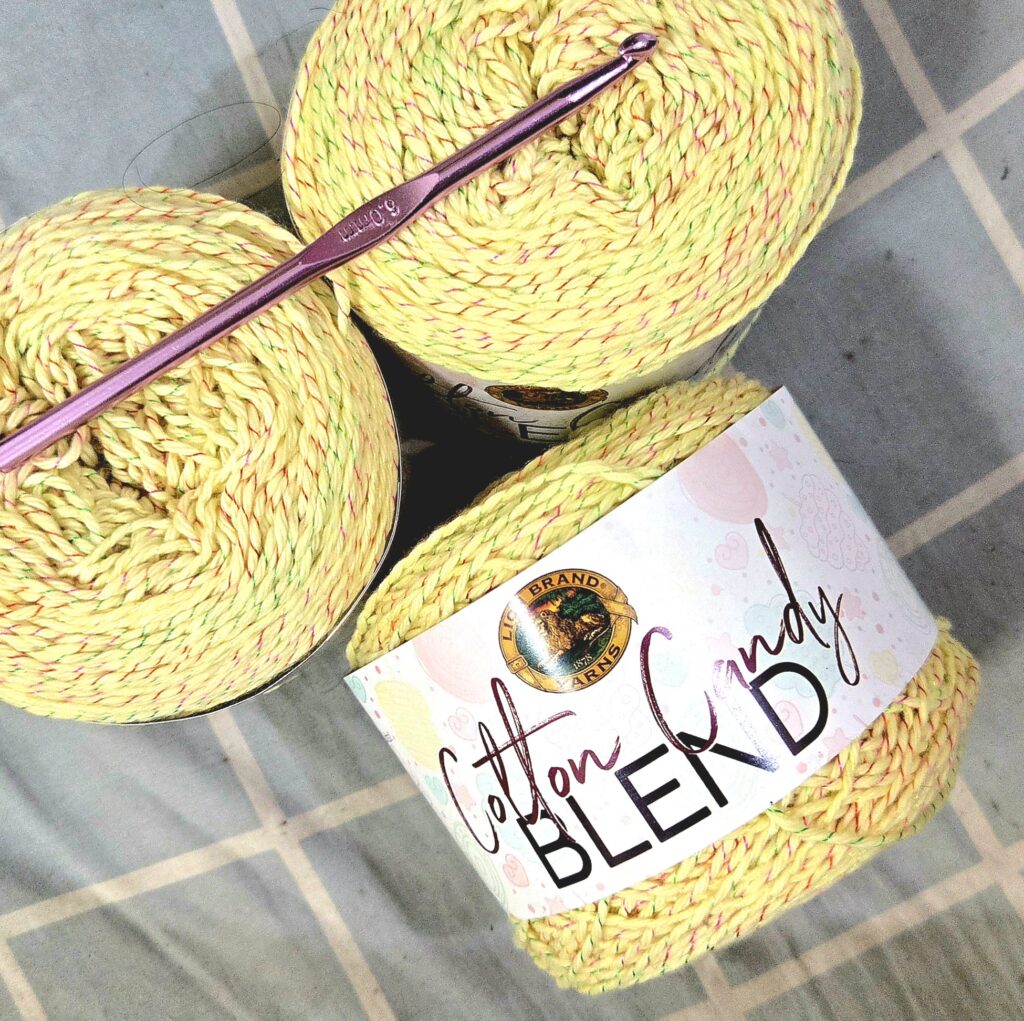
- Hook Tweaks: While a 6.0mm hook was recommended, my test stitches turned out far too loose. I downsized to a 4.0mm hook, which gave the open lattice work much better structure and definition without sacrificing drape
- Late-Night Reality: I have to admit, working on this shade of yellow late into the evening made the texture look dangerously like scrambled eggs! But once the panels grew, the geometric mesh really began to shine.
Panel Design & Grid Layout
The beautiful thing about this 2-in-1 design is its complete flexibility—you can use almost any rectangular mesh or lace pattern you love!
To give you a blueprint, here is a visual grid breakdown of how I constructed my specific panels:
- To start, ch 51. Starting from the 3rd ch from the hook, dc across. There should be a total of 49 dc. This is the 1st row of the first panel.
- My panels alternate between solid double-crochet blocks and open chain-space grids to form geometric squares.
- Each X block represents 2 dc and each empty block represents 2 ch. Each block has a dc in beginning and end connecting with the next block. See the graphic for the chart.
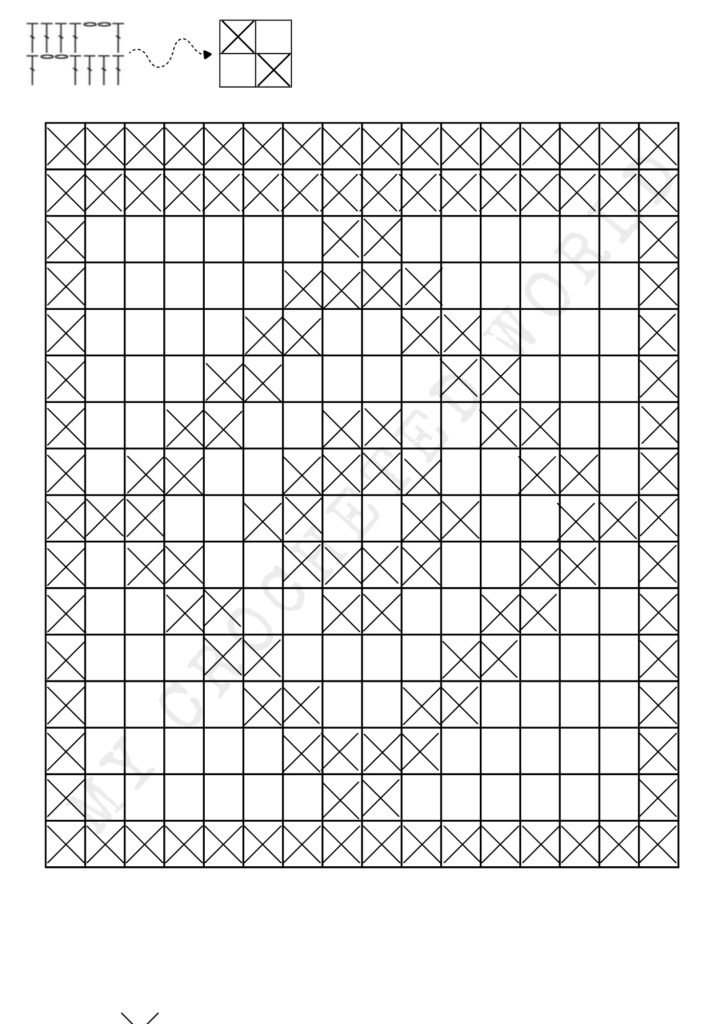
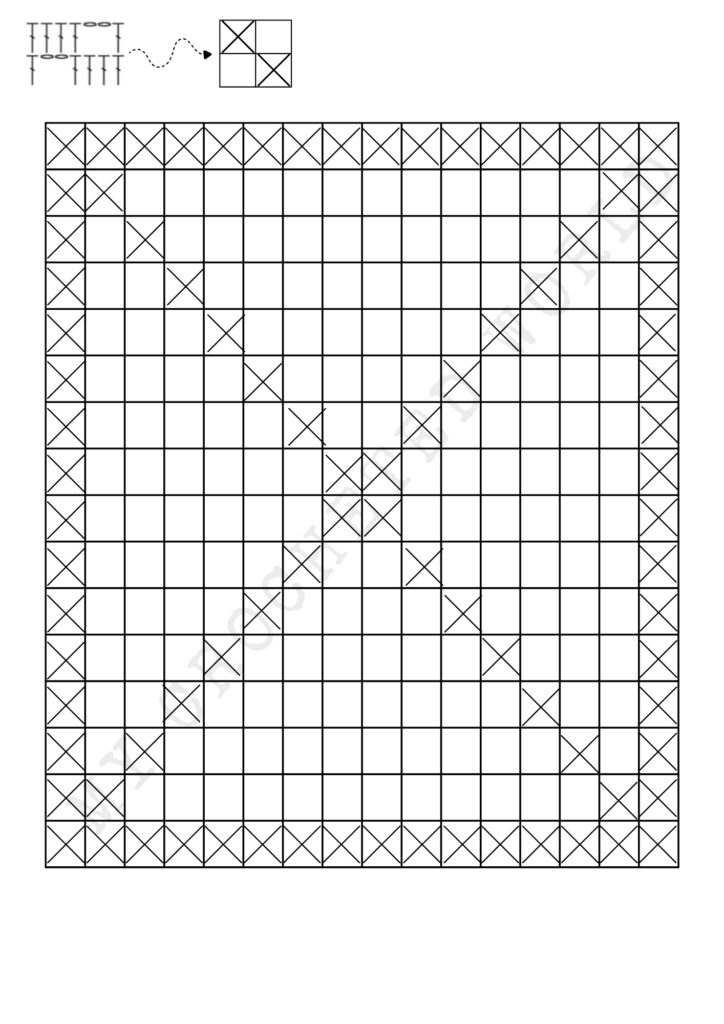
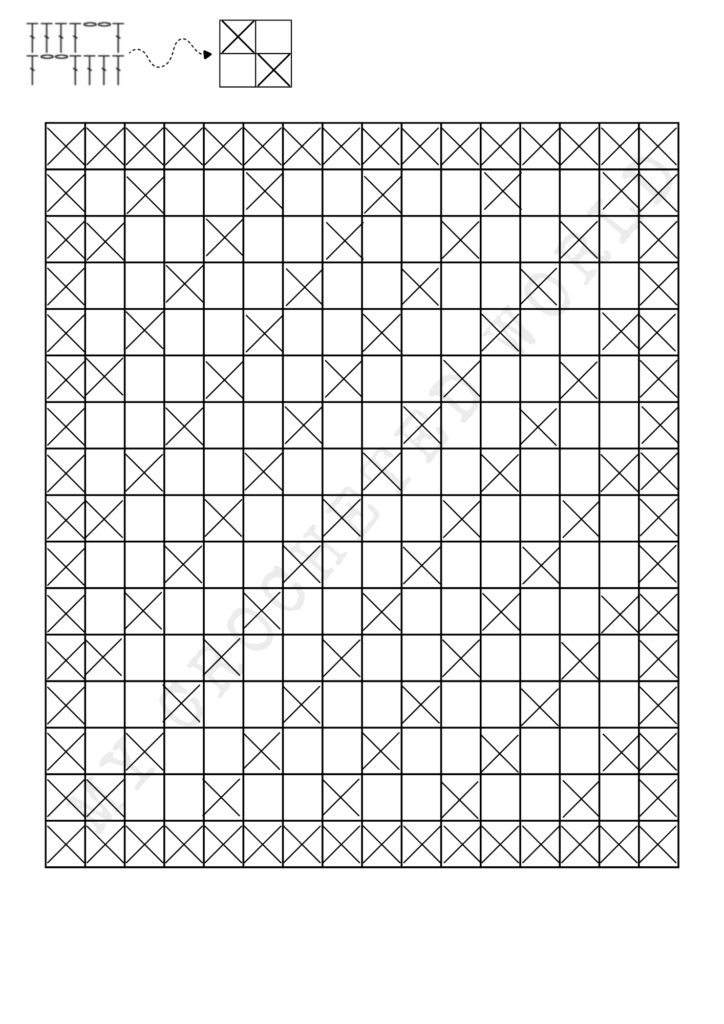
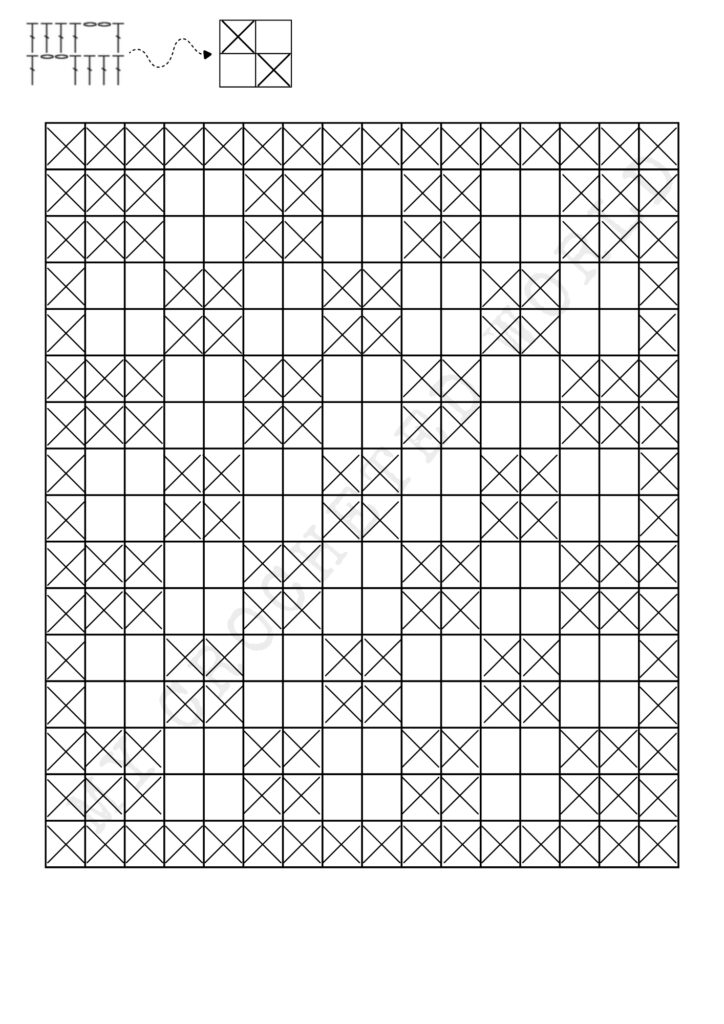
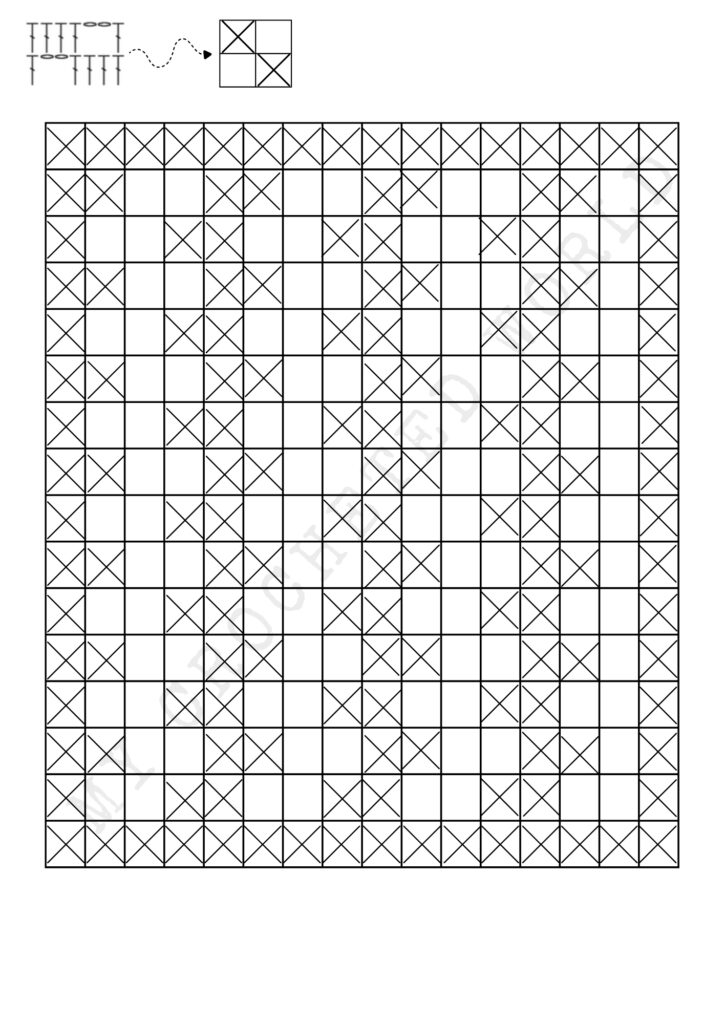
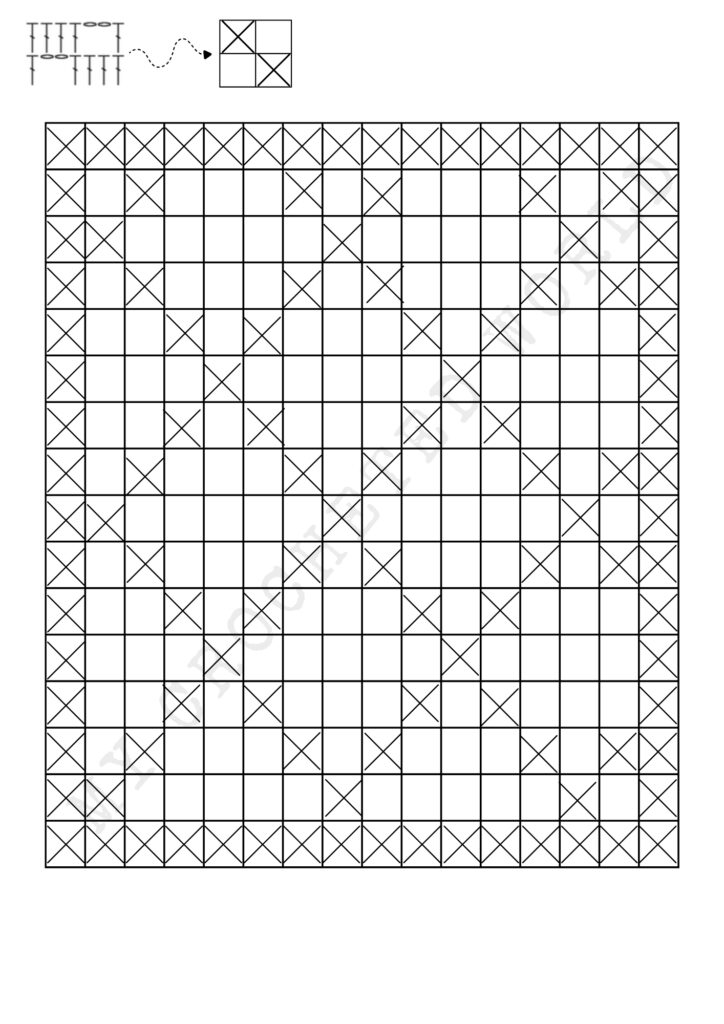
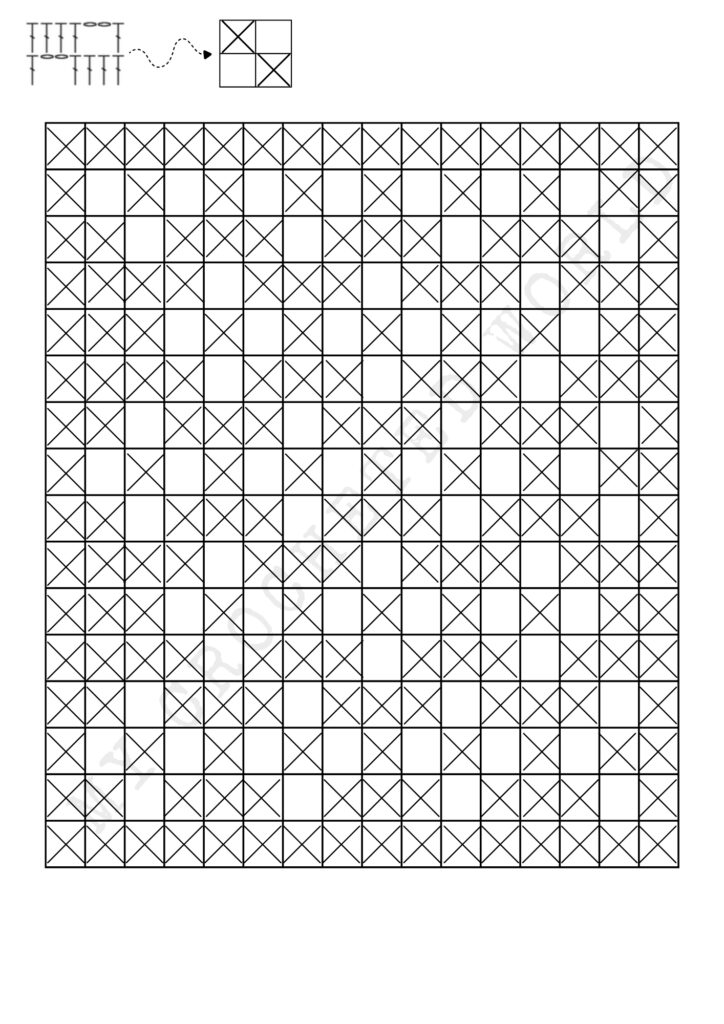
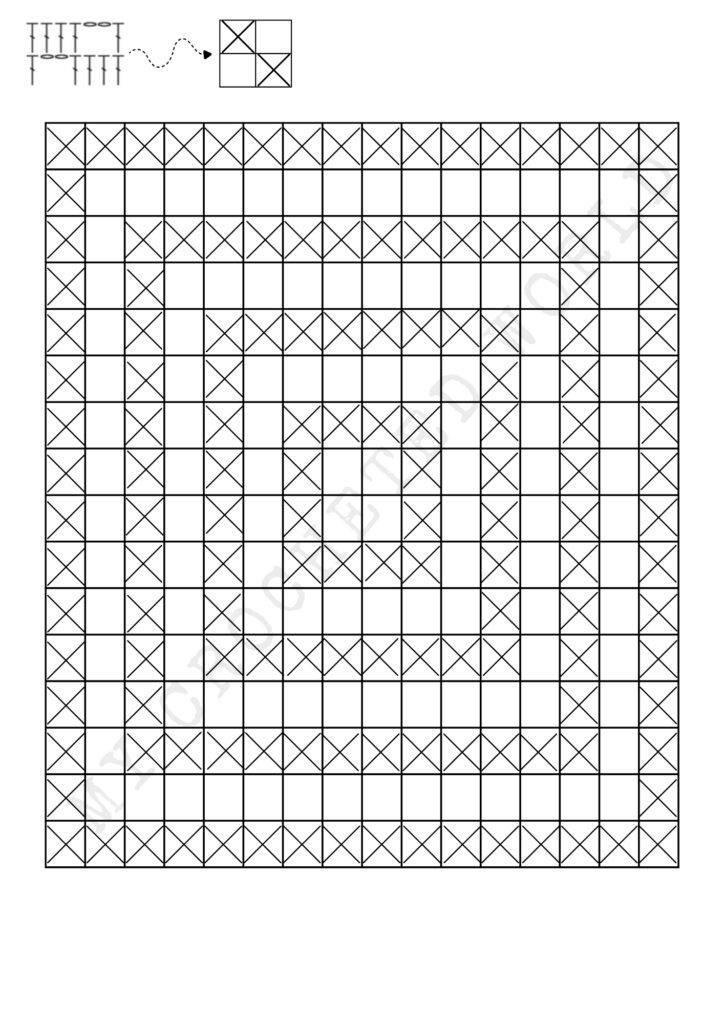
- Create 2 panels with 4 squares each. Then join the sides of the top and bottom squares.
- Finish with your desired edging stitch.
- On 2 sides parallel each other, attach buttons or large beads. Then for the two remaining sides, criss-cross strings that can be cinched to fit
Two Ways to Wear
What makes this piece so fun is its versatility:
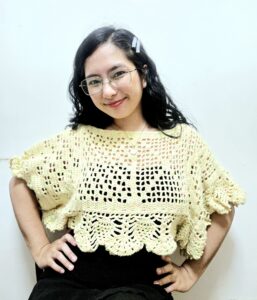
Look 1 (Boatneck): Styled with a wide boatneck, cinchable drawstring sleeves, and a delicate scalloped hem. While I originally thought the V-neck would be my favorite, this boatneck style completely won me over!
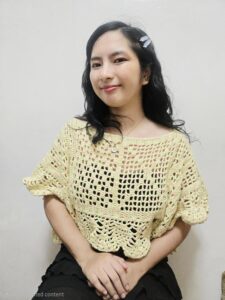
Look 2 (V-Neck): Turn the piece sideways, and it transforms into a soft V-neck top with fluttery sleeves and a relaxed fit.


This project was an absolute joy to make. There is something so satisfying about taking two simple rectangles, joining them in a creative way, and ending up with two distinct outfits in one piece. It is lightweight, incredibly easy to whip up, and perfect for warm weather styling.